With Mueller homes so cozy, our clay soil has a hard time absorbing water after a storm. Soil between adjacent houses slopes toward the property line, but there isn't enough slope front to back to coax the water out. A french drain along the fence line will hold the water until the soil can absorb it, and if there is just too much water, the drain will channel it toward the front and back of the houses where it can exit.
Here is a list of items we used in our design:
(1) Can of white marking spray paint - $6
(9) 4" x 10' Rigid PVC pipe w/ 2 rows of holes on the bottom - $90
(2) 4" PVC Tees - $5
(2) 4" PVC 90º Elbows - $7(4) 4" PVC 45º Elbows - $10
(2) 6" square grates that fit on 4"dia. drain pipe. - $7
(4) Small round catch basins and grates - $48
(1) 9" square catch basin kit with grate - $30
(1) 4' x 100' Roll of 30 yr. fiberglass landscape fabric (weed block) - $45
(1) 4' x 50' Roll of 30 yr. fiberglass landscape fabric (weed block) - $25
(2) Boxes of 100 landscape fabric staples - $24
(1) 4" x 100' drain sleeve - $20
(3) Cubic yards of 5/8" - 1" River Rock w/ delivery - $200
(2) Downspout elbows - $6Total project cost: $523
The drain is not just the pipe, but the rock too. This is a lot of work and I only want to do it once. This is why I used the more expensive landscape fabric and the rigid PVC pipe. Home Depot sells a 4" x 100' black flexible drain pipe that already has a pipe sleeve on it. It is far less expensive than this system; however, the ridges in the pipe are notorious collectors of dirt, making it prone to clogging and hard to clean out. It is also much more difficult to slope it because it conforms to the bottom of the trench. We bought our supplies from Home Depot and the river rock from
Organics by Gosh, who will deliver for $100.
Tools used:
Work glovesWheelbarrowDrain spade16" round point shovelRound point shovelSquare point shovelHand trowels5 lb. pick mattock
2 1/2 gallon bucketLevelMeasuring tape
String levelHammer and block of wood(4) Large heavy duty tarpsHacksawScissorsDrill and 1/8" bit
We had a lot of these tools already, except the wheelbarrow and the string level which are both at Home Depot.
Preparation and precautionFirst off, we used the white marking paint to lay out the drain. At a couple of locations, we had to jog the trench to avoid utility boxes and fence posts. We made 45º turns in our design to minimize water impedance.
We called 811 and had the city come out, free of charge, to locate the buried utilities. Here is a
link to the utilities' color chart. They had everything marked off within 48 hrs. We took pictures of the marks for future reference.

Most utilities are buried 18” below grade; however, I found this unmarked conduit at 12” and Time Warner’s cable at only 2” below the surface. Note the new $50 splice. The sprinkler lines and rain gauge line are not located by the city; they are private property and the responsibility of the owners not to break while digging. We were lucky. They are easy to repair, but I’d rather be working on the drain then fixing sprinkler pipe.

Lesson learned: Dig with caution.
Digging the trenchWe dug a 12" wide x 12" deep trench from our A/C unit to the sidewalk and a second one from the A/C unit to the alleyway. Our A/C unit is too close to the fence to dig, so we divided our drain into two separate lines and just left that 3' section between them undisturbed.

Aside from finding sprinkler pipes and cable lines, we mostly found bits of lumber from the concrete forms, framing nails, and a few bits of the old airport tarmac.
If you plan to bury the drain, you'll want to dig 14" to 15" deep so you will have 2" to 3" of soil to cover your completed 12" deep drain. We are building up our side yard by adding 2" to 3" of decomposed granite on top of our existing soil.
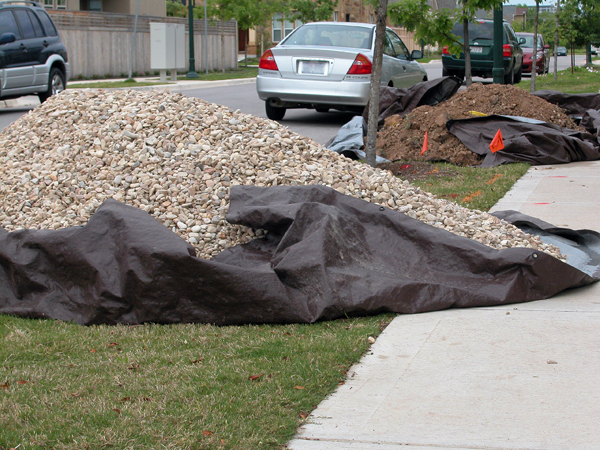
Plan ahead what you will do with the excavated soil. We did not and ended up moving the same mound of dirt four times. If I had to do it over again, I would have dumped it directly into the back of my pick-up. We made four trips to
Texas Disposal Systems where they charge $3 for a load of dirt, as compared with $35 or more per truckload of trash elsewhere.

Inside the fence, there is limited slope from front to back, so starting from A/C unit we sloped our drain 1" for every 8'. Once we made it to the gate, the grade sloped away from the house so there was no need to dig any deeper than our minimum depth.
Dry WellsAt the ends of our drains we dug an additional 12" beyond the bottom of my trench creating a hole directly under our future catch basins. This provides more space especially at the ends where the water will collect the most.
 Layering
Once the trench was finished, we lined each dry well with 4' x 4' squares from the 4' x 50' roll. We used the fabric staples to keep them open while we filled it to the bottom of the trench with river rock.
We rolled out the 4' x 100' landscape fabric along the entire trench, over the top of the dry wells, and fit it to the bottom with fabric staples to hold it in place. The landscape fabric will minimize the dirt in the drain system.
We poured a 3" layer of river rock and dropped in the PVC with the holes facing down. The pipes have a flare at one end so they can be fitted together using the hammer and block of wood. We could have glue them together, but being that there is no pressure in this pipe we chose just to pressure fit all the joints. Using the hacksaw we inserted our 45º elbows and tee intersections.
We added a couple of tees and ran short pipe segments to 90º elbows that turned up to our downspouts. We didn't directly connect the downspout to the french drain, but put the 6" square grates at grade level. The grate will filter from the french drain any large debris, such as leaves and sticks. We then added an additional elbow to the downspout to direct it over the grate.
We used the string level to adjust the slope of our pipe by adding or removing the rock until we achieved our 1" to 8' pitch, then sleeved the entire pipe with a drain sleeve. This minimizes dirt from entering the rock layer though the pipe.
At the ends we installed catch basins. They are big enough to get a hand into so we can clean them out and run a hose into the drain. We drilled several holes into the bottom of the basin for water to drip into the dry well below. This also prevents mosquitoes from breeding.
Once our basin was in place we poured river rock around it to secure it.
We added an additional dry well and catch basin directly across from our water spigot.

Finally, we burred the rest of the pipe with river rock, pulled the staples, and folded over the excess landscape fabric.
With the hacksaw we cut the 4' x 50' roll of landscape fabric in half then rolled and stapled it over the top of the drain.
To finish the project we are adding a 2" to 3" layer of decomposed granite and pavers sloped away from the foundation to finish off the side yard. More photos to come when the project is complete.


